You may remember I shared DIY birthday invitations a couple weeks ago with a cute bandana theme for a fall carnival party. Here’s a reminder of what they looked like:  Invitations set the theme for your party, and I think it’s important to carry that theme all the way through the party, beginning with the decorations.
I’ve seen these cute banners all over the internet, and when my friend said she wanted to make one for her party, I was excited to help. This was such an easy project, and the ways to customize it are just endless. Here are the supplies we used:
*Sorry for the photo quality, of course I forgot my camera and had to take pictures with my phone*
My friend printed out individual letters (in the same font used on the invitation) on textured postcard paper, so we didn’t have to cut them to size or anything. We also used a hole punch, jute twine, and strips of fabric.
Next, we punched two holes in the top center of the card and strung the twine through. We then cut strips of bandana print fabric and tied them between each letter.
She wanted to embellish it a little further, so she used Glitter Glue to trace each letter for some extra sparkle.
Here it is strung along the fireplace mantel:

I searched around for a few more examples to give you an idea of how versatile they are.
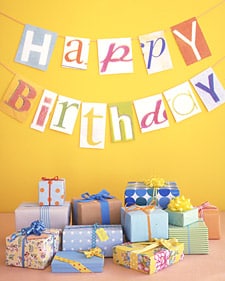
Image courtesy www.thoughtfullysimple.com

Felt banner from www.jollymom.com
The Red Chair Blog has a great tutorial for a chalkboard banner:
These banners aren’t just for birthdays, either. They are great for wedding or baby showers, football parties, and just about any celebration you can imagine. Just use your creativity and see what you can design!
Tomorrow I’ll share the rest of the party decor, stay tuned!












These banners seem to popping up for every holiday. I love the invitation you did! I'm getting married in Natchitoches next June and plan on googling & blogging some DIY, yet classy, invites. Thanks for the post. Erin
ReplyDeleteVery cute and I like the bandana fabric tied on it.
ReplyDeleteI love the look of banners. The fact that this one was personalized for the party made it even better. Thanks for sharing the details.
ReplyDeleteJane
Christy ~ They are wonderful & easy to do. What fun.
ReplyDeletePopover for our TRIPLE GIVEAWAY if you haven't already. Have a lovely eve. TTFN ~Marydon
Thanks for the great tutorial! I've seen these banners but didn't know to make them. I love that you included other examples. Great job!
ReplyDeleteSuper cute! Love the addition of fabric! Thanks again for linking up to the Celebration Party! I greatly appreciate it! Hope you enjoyed your weekend!!
ReplyDelete