Be sure and check out the SUPER SALE going on now on my Facebook Page! Fabulous deals on out of season merchandise! Click HERE to check it out!
Showing posts with label organizing. Show all posts

Sunday, January 2, 2011

A Fresh Start: DIY Memo Board

Well, it is a brand new year and for many that means a time to make a fresh start.  I typically don’t make New Year’s resolutions, but I know for many one goal is to get organized.  This was the case for a good friend of mine who wanted to de-clutter the front of her refrigerator.  So I knew the perfect Christmas gift for her would be a “new” memo board where she could display photos, her daughter’s artwork, and other important information. 

I had just the thrift store frame in my stash to transform:

IMG_2489

Sorry little angels, but you’ve got to go bye-bye!

IMG_2490

The first thing I did was remove the artwork from the frame and give the frame a couple coats of brown spray paint.  Then I distressed the frame a bit with some sandpaper.  No photos of those steps, but I’m sure you get the idea.

Then I purchased a piece of sheet metal from Lowe’s.  Make sure you don’t get aluminum because it’s not magnetic.  They sell pre-cut sheets, but I had to trim one with tin snips to fit my frame’s measurements.

I found some cute fabric at Hobby Lobby and just hot glued it to cover the sheet metal.

IMG_2505IMG_2504

Then I popped the whole thing back in the frame and used some small nails to hold it in.

IMG_2509IMG_2511

The finishing touch were these coordinating magnets:

IMG_2510

You can find the glass marbles at any craft or dollar store, and then modge podge scrapbook paper to the back and hot glue on a magnet.

IMG_2512

Voila! Instant organization!

Here’s another look at the

BEFORE:

IMG_2489

and AFTER:

IMG_2513

What are some of your goals for the new year?  I’ll be linking this post to the following parties:

metmondayDIY Blog button

It's a Blog Party Transformation Thursday

Wednesday, November 10, 2010

Inspiring Spaces

I’ve been holed up in my “sweat shop” the past couple of days, mainly working on these cute Ribbon Turkey T-shirts:

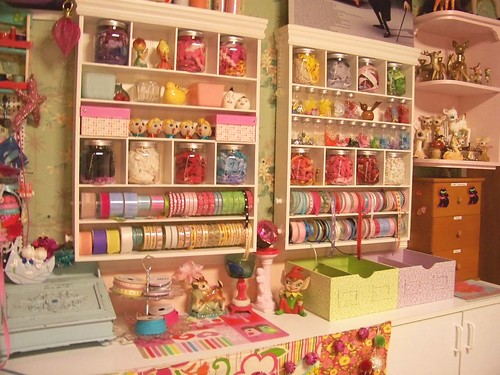
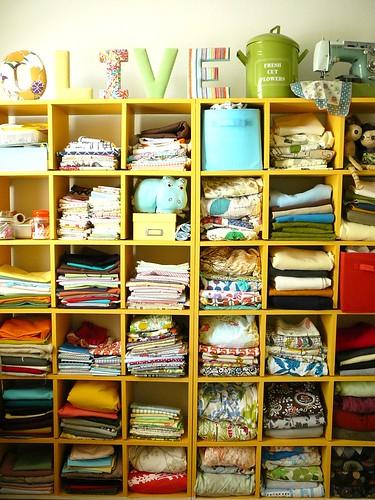
IMG_2308 So while taking a break to check emails and blogs, I got the idea to share a few craft spaces that caught my eye.  While my craft room/office is functional and somewhat organized, it is not nearly as beautiful as some others.  Prepare to be amazed at these inspiring spaces I found on Flickr.  Click on the photos to be taken to the Flickr photo stream.

Sewing room My sewing room My sewing room My sewing roomMy studio My Office/Craft Room In My Old House Ish & Chi studio

Hope you enjoyed…..now wipe the drool off your computer!

Wednesday, February 17, 2010

Quick Ribbon Storage

So we all know about my slight addiction affinity for all things fleur de lis.  It seems I may have developed another collection of sorts.  Apparently I’ve been hoarding ribbon:IMG_0148I bought one of these handy-dandy ribbon organizer spool thingys but quickly out-grew it:  IMG_0144

So I added a couple more plastic containers:

IMG_0143I even recycled canisters for ribbon storage; still running out of room:

IMG_0146

I knew there had to be a better, more space saving way to store my ribbon while still being able to view and access it easily.  I’ve seen all sorts of ribbon storage ideas on other blogs, but instead of hunting for something to re-purpose or buying something new, I decided to take the easy way out and just use some wire hangers.        IMG_0157

Now all my ribbon is easily within reach right in my craft closet!  I can carry the hanger to wherever I’m working or just cut off the length I need right from the closet.

IMG_0168IMG_0162These are actually the wire hangers that are coated with soft plastic, so they are a little more durable.  I just unwound the neck, slipped the ribbon spools on, and secured it back.

IMG_0166I still store my wider ribbon in boxes that can easily be stacked & stored on a shelf.  I also employed the wooden clothes pin technique and wrapped smaller scraps to eliminate some spools.

IMG_0158

Quick and easy, and best of all it was FREE!

What method do you use to store your ribbon?

Sharing with:

TTbutton  thriftthursday frugalicious friday

Sunday, November 1, 2009

Quick & Easy Custom Organization Solution

I have a quick and easy project to show you today.  I’m sure you’ve all ended up with empty plastic containers and just thrown them in the recycle bin…I accumulated a few this past week and decided to put them to better use as storage containers in my office.  I started with 2 Mr. Clean Wipes boxes, a plastic can from some icing, and a large bucket from some peanuts:

IMG_3252I cut down one of the Mr. Clean containers so I ended up with two different sizes.  You can either use fabric or pretty scrapbook or wrapping paper, I chose leftover fabric to coordinate with the curtains and chairs in our office/craft room.  Just cut the fabric/paper to fit your container:IMG_3253

I made this really easy by just ironing down the edges for a more finished look and using hot glue to attach the fabric to the container, overlapping the back a bit.  IMG_3266

And, voila!! Custom desk accessories!

IMG_3259

You can either cover exactly to your container or bring up any excess over the top to the inside.  I did it both ways, but I really don’t think it matters, once the containers are full you don’t see the inside anyway.

IMG_3269

I didn’t worry about getting the edges or back seam perfect; after all, I’m really the only person who’s going to notice, right? IMG_3267I’ll probably use the larger can to store bits of ribbon and such.  I saved the top, but it is blue so I may have to spray paint it black!IMG_3263 IMG_3264

This was such an easy project, I’ve seen it done before with soup cans, too and it really did take only minutes.  Now I don’t have to hunt in drawers or boxes for the craft supplies I used the most, such as paint brushes, scissors, markers, etc.  One more time, here’s the

BEFORE

IMG_3252

AFTER

IMG_3259 

This was a great way to recycle and re-purpose.  So think twice before throwing out those empty containers, you can use them in so many ways!  I’ll be linking to the usual parties, be sure and click on the buttons below to visit everyone.

Edited on 11/15/09 to join the party over at Cottage Instincts, since all the materials for this project were already on hand!

metmonday tdcbeforeafter  REINVENTED_AD kimbaDIY125TTbutton   thriftthursday 

Related Posts with Thumbnails