Be sure and check out the SUPER SALE going on now on my Facebook Page! Fabulous deals on out of season merchandise! Click HERE to check it out!
Showing posts with label recycle. Show all posts

Tuesday, August 31, 2010

Wind Chimes From Found Items

I found a few more photos on my phone from my trip to New Orleans last month.  I snapped these in an antique store on Magazine St.

It’s kind of hard to tell, but these are wind chimes made from found items like old keys, silverware, and various other kitchen tools.

0729101252-02 0729101252-00 0729101252-01

What a great idea to re-purpose all those mis-matched flea market finds and random useless keys you find in a drawer!  This would be a fun project to do with kids as well.  Sharing with Transformation Thursday and House of Hepworths.

Tuesday, August 10, 2010

Quick and Easy Paint Can

I learned this little trick from my mom several years ago during one of our many painting adventures.  Some of you may already do this, but I thought I would share anyway.  Instead of spending money on paint cups and containers from the hardware store, re-use and recycle a container you already have!

IMG_1630

Any kind of jug will do….milk, juice, detergent…just cut it down and around the spout leaving an opening large enough to pour paint into.

IMG_1632

Leaving the handle attached makes it comfortable to use while painting a room or furniture.

IMG_1631

Just a quick tip that I thought I would share!  Linking up with Works for Me Wednesday and the Power of Paint

Friday, April 23, 2010

Recycled Post: Easy Organizer Make-Overs

Originally posted 07/30/09:

This was a quick and easy DIY that took only a few minutes and a few dollars.  I found this spice rack at Goodwill for $3.99:

IMG_2076

After a coat or two of purple spray paint, it has been transformed into a fun and funky….

IMG_2140

….craft paint organizer!!

IMG_2145

IMG_2146

This turned out to be the perfect size for a great space saving solution to storing all those little bottles of craft paint that get jumbled together.  This rack ended up holding about 30 bottles of paint. Now they are all displayed neatly and I can easily pick out the needed color with just a glance! No more picking through a sea of white tops! 

Originally posted 11/01/09:

I have a quick and easy project to show you today.  I’m sure you’ve all ended up with empty plastic containers and just thrown them in the recycle bin…I accumulated a few this past week and decided to put them to better use as storage containers in my office.  I started with 2 Mr. Clean Wipes boxes, a plastic can from some icing, and a large bucket from some peanuts:

IMG_3252I cut down one of the Mr. Clean containers so I ended up with two different sizes.  You can either use fabric or pretty scrapbook or wrapping paper, I chose leftover fabric to coordinate with the curtains and chairs in our office/craft room.  Just cut the fabric/paper to fit your container:IMG_3253

I made this really easy by just ironing down the edges for a more finished look and using hot glue to attach the fabric to the container, overlapping the back a bit.  IMG_3266

And, voila!! Custom desk accessories!

IMG_3259

You can either cover exactly to your container or bring up any excess over the top to the inside.  I did it both ways, but I really don’t think it matters, once the containers are full you don’t see the inside anyway.

IMG_3269

I didn’t worry about getting the edges or back seam perfect; after all, I’m really the only person who’s going to notice, right? IMG_3267I’ll probably use the larger can to store bits of ribbon and such.  I saved the top, but it is blue so I may have to spray paint it black!IMG_3263 IMG_3264

This was such an easy project, I’ve seen it done before with soup cans, too and it really did take only minutes.  Now I don’t have to hunt in drawers or boxes for the craft supplies I used the most, such as paint brushes, scissors, markers, etc.  One more time, here’s the

BEFORE

IMG_3252

AFTER

IMG_3259 

This was a great way to recycle and re-purpose.  So think twice before throwing out those empty containers, you can use them in so many ways!  I’ll be linking to the usual parties, be sure and click on the buttons HERE to visit everyone.

Thursday, April 22, 2010

Recycled Post: Earth Day Tips

Originally posted on 04/22/09

I Googled "simple ways to go green", and found several tips. Here's a list of the ones I personally do, and I find they don't really take that much extra effort on my part:
 
1. Use rechargeable batteries.

2. Adjust freezer & refrigerator temps (keep the fridge at 37° F. and the freezer at 0° F).

3. Consider using compact fluorescent light bulbs (CFLs). They cost a bit more than regular bulbs, but you'll lower your electric bill and pay less in the long run.

6. Recycle! Your trash is someone else's treasure! Check out http://www.freecycle.org/ and http://www.earth911.org/.

7. Buy a laptop (they use less energy than desktops).

8. Get off the junk mail list (Register with the Direct Marketing Association's Mail Preference Service (dmaconsumers.org) and you'll see a significant reduction in mail after three months).

9. Double up on printing. Configure your printer so it prints on both sides of the paper or use the other side of paper you would otherwise be recycling.

10. Tote your own grocery bag. Most places like Dollar Tree or Wal-Mart sell re-useable grocery bags for $1 or less.

11. Switch to organic products (I try to buy at least organic fruits & veggies).

12. Wash clothes in cold water whenever possible.

13. Set your thermostat a few degrees lower in the winter and a few degrees higher in the summer to save on heating and cooling costs.

14. Use a water filter to purify tap water instead of buying bottled water. Not only is bottled water expensive, but it generates large amounts of container waste. 
15. Use a reusable water bottle.

16. Check out garage sales, thrift stores, and consignment shops for clothing and other everyday items.

17. Borrow from libraries instead of buying personal books and movies. This saves money, not to mention the ink and paper that goes into printing new books.

18. Share power tools and other appliances. Get to know your neighbors while cutting down on the number of things cluttering your closet or garage.

19. Wear clothes that don't need to be dry-cleaned. This saves money and cuts down on toxic chemical use.

20. Keep your cell phones, computers, and other electronics as long as possible. Donate or recycle them responsibly when the time comes.

Wow, I can't believe how long that list got, several of them I didn't even realize I was doing! And there are so many other things I could be doing, like making my own cleaning products.

Find more great ways to go green from Good Housekeeping, the Worldwatch Institute, Glamour magazine, and the Today Show.   There was also a great article in this month’s issue of Glamour magazine called “How to Create Less Trash”.  I tried to find a link online, but couldn’t.  So next time you’re at the library or bookstore be sure to check it out if you don’t already have a copy.
 

Tuesday, April 20, 2010

Recycled Post: DIY Jewelry Organizer

Originally posted 8/6/09.  For other jewelry organizer frames, click HERE.

This week’s project is one I’ve been itching to try. Last week I had the chance to make a jewelry organizer with my sister while she was in town visiting.  My sis is 17, and we all remember what it was like at that age, right?  You had to have a pair of earrings to match every outfit, and you wore a different necklace or ring everyday…..so of course she needed a place to keep all that bling!  I remembered the DIY jewelry holders that a couple bloggy friends had created, namely this one from Embellish and this one from Centsational Girl.

So we went off to an antique store to find a frame to transform.  It was my sister who spotted this mirror ($12.99) and had the great idea of keeping the mirror in the middle and having the jewelry hang around it.  We were so excited to get started we forgot to take a good “before” photo:

IMG_2331 IMG_2330

The frame was originally a dark forest green, and we spray painted it a brighter green to match her room.  Then we used sandpaper to distress it a bit.

IMG_2336She picked out some pretty scrapbook paper and layered window screen on top of it around the sides of the mirror. Here’s the after:

IMG_2332 IMG_2334 I just used a staple gun to attach the screen and the paper to the back of the wood frame, then placed the mirror and backing back in the frame. 

IMG_2338

We bent a paperclip and inserted it into the screen to hold rings, necklaces, and bracelets.  We actually spray painted some cup hooks to screw along the sides and bottom, but she decided she didn’t want to use them. Sorry for the blurry photos!

IMG_2335This project was so fun and easy, it probably took less than an hour to complete (not including drying time).  The best part about this project was getting to spend some quality time with my sis creating something fun and original that she will hang onto for a while. Once it was finished, my sister kept saying “That is soooo cool!” Glad to know she doesn’t think I am big craft geek!

I couldn’t resist making another one this week with this frame I found at the Flea Market.

Before:

IMG_2233After:

IMG_2410

IMG_2412

IMG_2414

Click HERE for awesome linky parties!

Monday, April 19, 2010

Recycled Post: DIY Credit Card/Hotel Card Jewelry

Originally posted 8/13/09

I have another quick, easy, and cheap thrifty DIY transformation this week.

You may remember my sister and I made a quick shopping trip to Dallas a couple weeks ago.  Upon leaving the hotel, my sister grabbed the plastic hotel key cards and said “I’m keeping these!” I thought they would be a pretty cute souvenir.

IMG_2348

The more I looked at them, the more I thought we should do something with them….I suddenly thought they would make cute earrings! Since this would be my first attempt at making any sort of jewelry, we had to make a supply run.  We picked up some jump rings and ear wires like these:


We cut the cards into various small shapes. I then used a leather punch (because it was handy and I didn’t feel like messing with the drill) to make holes in the top of the shapes. We then attached the jump rings and ear wires with needle nose pliers.  Voila!  Custom jewelry!

IMG_2384

Here’s my beautiful sis modeling one set:

IMG_2351 More photos of our completed designs:IMG_2353

IMG_2383

IMG_2382Out of the two cards, I think we ended up making at least four sets of earrings and three pendants. Now she has a unique, wearable souvenir!  The way they are printing such cool designs and photos on hotel key cards, gift cards, and credit cards these days, the possibilities are endless! 

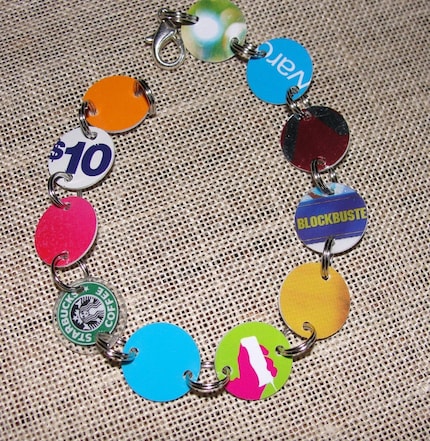
You could take a little more time and make a bracelet like this one on Scavenging:

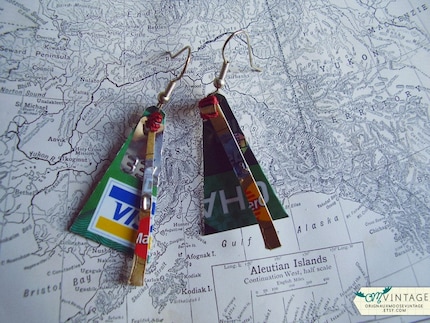
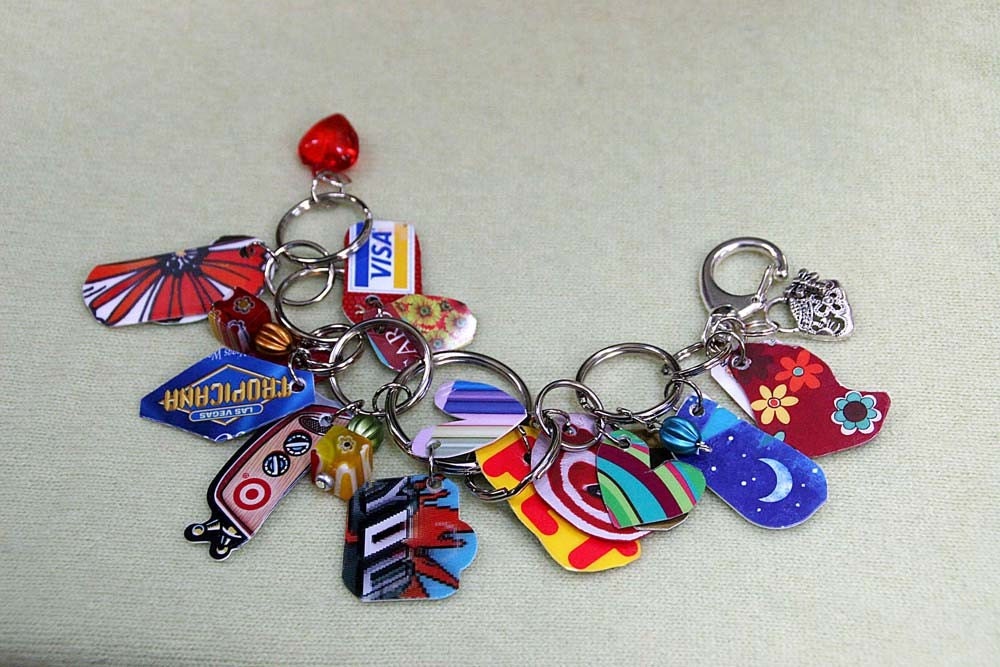
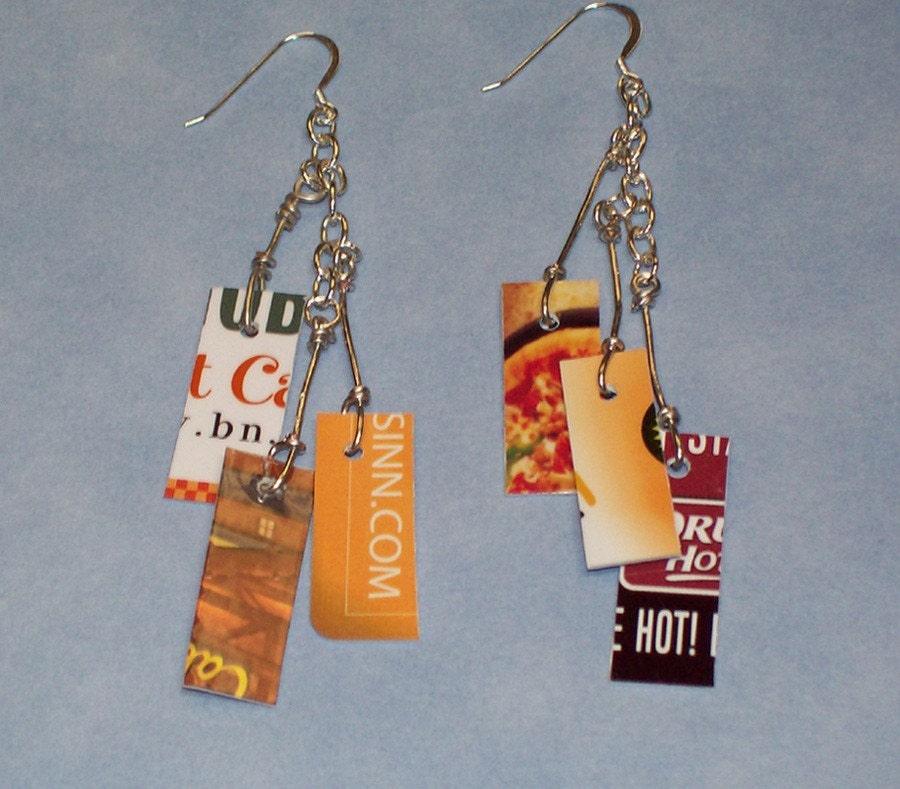
And check out these cute pieces for sale on Etsy (click on the photos to go to the listing):

Now you’ll think twice about leaving your hotel key behind or letting the cashier keep your redeemed gift cards!  I’m sure we all have a stash of used gift cards or expired credit cards taking up space in a drawer.  Save them from the landfill or recycle bin and turn them into wearable art!

Sharing with some of the parties seen HERE.

Related Posts with Thumbnails